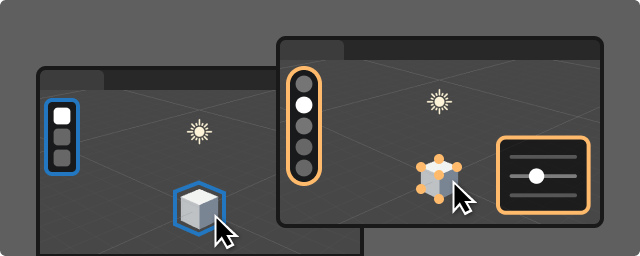
Log-in required.

You are trying to access the internal Editor Foundations design system.
Sign-in with your Unity Google account to continue, or visit the public site.

Implementation references

Overviews
UI Toolkit Standard Library Contribution Workflow
This document is for anyone interested in contributing to the UI Toolkit controls.
Custom Editor Tools
Get started writing custom editor tools.
Overlays
Panels and toolbars in the Editor scene view which expose actions and tool options.
Tooling APIs
EditorTool
Base class used to implement all editor tools. Registered with EditorToolAttribute.
EditorToolContext
Base class used to implement contexts in which custom editor tools can be active. Registered with EditorToolContextAttribute.
ToolManager
Manage editor tools and contexts and set which context or tool is active.
Handles APIs
Handles
3D controls for manipulating items in the Scene view.
Context Menu APIs
ContextMenuUtility
Add tool context specific actions to the Scene view context menu.

Tooling · UX essentials

Best practices to provide access points to contextual actions, items or windows.

Follow the provided guidance for a first prototype
Blue plus sign icon indicating that clicking on this will expand this content
Aim for contextual, non-global solutions
Blue plus sign icon indicating that clicking on this will expand this content
Do not try to exactly recreate an existing feature
Blue plus sign icon indicating that clicking on this will expand this content
Do not test your feature in isolation
Blue plus sign icon indicating that clicking on this will expand this content

Framing the Topic

Authoring a cube in the Scene view for visual manipulation and the Inspector shows more complex manipulation are possible.

Terminology

Edit Mode
A mode that enables selection and manipulation of non-GameObjects.
Component Tool
A tool that enables drag-interactable (not selectable) handles for editing a Component.
Creation Tool
A tool that enables drawing or placing new GameObjects.
Tool Setting
A setting that changes the behavior or visuals of a specific Tool.
Action
A one-click, immediate change.
Contextual Overlay
An overlay to show info that is only relevant to a specific tool, selection, view mode, etc.
Global Overlay
An overlay to show info that is always useful and present.
View Setting
A setting that changes how or what is visible, and is always applicable.
Overlays
For more information on Overlays and layouting guidance, go to Overlays / Layout modes

Guidance

Edit Mode

Enables the user to select a single GameObject, then enter a specialized “Edit Mode” for viewing, selecting, and manipulating parts of the GameObject.

By activating Spline Edit Mode, you can select and manipulate points on a Spline.

As a user;

Do recommendation illustrated by a green checkbox icon

For any object in my Scene, I can easily determine if it has editable sub-elements

Do recommendation illustrated by a green checkbox icon

I can do that editing with the standard tools that I already know well

Workflow

1. Select a GameObject.

2. If this GameObject is editable, a edit toggle appears at the top of the Tools overlay.

3. Click the toggle to begin editing (or use the keyboard shortcut).

4. Matching tools, options, overlays, etc are shown.

5. Can click the toggle or keyboard shortcut to return to standard GameObject work.

Design Tasks

Icon of a letter I in a blue circle indicating this is a piece of informational content
Using an Edit Mode is a pretty big deal.
The following steps should help you get started, but are not comprehensive.
Dig in, try the examples, ask if you need more info!
Thank you! Your submission has been received!
Oops! Something went wrong while submitting the form.

Developer Tasks

Thank you! Your submission has been received!
Oops! Something went wrong while submitting the form.

Component Tool

Enables the user to easily modify a component using straightforward tools directly within the scene.

The "Edit Shape" tool is shown when a ProBuilder Object is selected.

As a user;

Do recommendation illustrated by a green checkbox icon

For any GameObject in my Scene, I can immediately determine what tools can be used on it.

Do recommendation illustrated by a green checkbox icon

Non-usable tools are never shown.

Workflow

1. Select a GameObject.

2. If the GameObject has a Component with Tools, those tools are shown as buttons in the Tools overlay, with a header icon to indicate their Component.

3. Click the button to activate the Tool.

4. Select a different GameObject, which has the same Component.

5. The Component Tool remains active.

6. Select a different GameObject, which does not have the same Component.

7. The no-longer usable Component Tool is deactivated and removed from the Tools overlay.

8. The last-used Transform Tool is activated (move, rotate, scale, etc).

Design Tasks

Thank you! Your submission has been received!
Oops! Something went wrong while submitting the form.

Developer Tasks

Thank you! Your submission has been received!
Oops! Something went wrong while submitting the form.

Creation Tool

Enables the user to draw or place GameObjects into the view.

The "Create ProBuilder Shape" tools are always available, to enable drawing shapes into the view.

As a user;

Do recommendation illustrated by a green checkbox icon

At any time, regardless of Tool Context, selection, or other situation, I can always see and use tools to create GameObjects.

Workflow

1. View the Tools Overlay.

2. At the bottom of the list, there is a separate section of Tools.

3. I activate any of these tools, and am now creating the GameObject type specified by the Tool, with mouse interaction in the Scene View.

Design Tasks

Thank you! Your submission has been received!
Oops! Something went wrong while submitting the form.

Developer Tasks

Thank you! Your submission has been received!
Oops! Something went wrong while submitting the form.

Tool Setting

Enables the user to choose how the active tool will behave.

In Spline Edit Mode, several additional Tool Settings are available for more complex editing.

As a user;

Do recommendation illustrated by a green checkbox icon

When I activate a tool, I can immediately determine what settings are available for that tool.

Do recommendation illustrated by a green checkbox icon

Non-usable settings are never shown.

Workflow

1. Activate a tool.

2. The Tool Settings updates to show the settings for this tool.

Design Tasks

Thank you! Your submission has been received!
Oops! Something went wrong while submitting the form.

Developer Tasks

Thank you! Your submission has been received!
Oops! Something went wrong while submitting the form.

View Option

Enables the user to view and modify settings that affect the view, and are always applicable.

Post Processing is always available in the View Options.

As a user;

Do recommendation illustrated by a green checkbox icon

I can immediately determine what settings are available for this view.

Do recommendation illustrated by a green checkbox icon

Non-usable settings are never shown.

Workflow

1. Change a setting in the View Options.

2. Continue working, across various Tools, Edit Modes, selections, etc.

3. The setting chosen remains applied and visible, until I manually change it again.

Design Tasks

Thank you! Your submission has been received!
Oops! Something went wrong while submitting the form.

Developer Tasks

Thank you! Your submission has been received!
Oops! Something went wrong while submitting the form.

Action

Allows users to view and access actions that match their selection: when selecting GameObjects, it displays default actions along with custom actions for each relevant Component, and when in Edit Mode, it shows only the custom actions specified by that mode.

With an item selected, right-clicking in the Scene View will show available actions.
  • In GameObject mode, ProBuilder objects will show “Export, Subdivide, Reset Pivot”, and other items in the Actions menu.
  • In Edit Mode, vertices will show “Collapse Verts, Weld Verts, Delete Verts” and other vertex-specific items in the Actions menu.

As a user;

Do recommendation illustrated by a green checkbox icon

When I select an object, I can immediately determine what actions are available for it.

Workflow

1. Select an item.

2. Right-click to open the Actions Menu.

3. The menu shows all available actions for the selection.

Design Tasks

Thank you! Your submission has been received!
Oops! Something went wrong while submitting the form.

Developer Tasks

Thank you! Your submission has been received!
Oops! Something went wrong while submitting the form.

Contextual Overlay

Enables the user to see contextual info when relevant.

When the "Bevel Edges" action is called, an overlay appears with options, and is removed after the action.

As a user;

Do recommendation illustrated by a green checkbox icon

In all situations and combinations (tool, selection, view modes, etc), I see any matching overlays, without needing to search for them.

Do recommendation illustrated by a green checkbox icon

I can control (hide, show, dock, anchor, etc) these overlays just like any other.

Workflow

1. Activate a tool/setting/etc.

2. Any applicable overlays show up.

Design Tasks

Thank you! Your submission has been received!
Oops! Something went wrong while submitting the form.

Developer Tasks

Thank you! Your submission has been received!
Oops! Something went wrong while submitting the form.

Global Overlay

Enables the user to access a certain overlay at all times.

The "Camera" overlay is always available to view in the Scene View.

As a user;

Do recommendation illustrated by a green checkbox icon

I can always find and enable this overlay, in any situation.

Workflow

1. Open the Overlays Menu.

2. Toggle the overlays visibility.

Design Tasks

Thank you! Your submission has been received!
Oops! Something went wrong while submitting the form.

Developer Tasks

Thank you! Your submission has been received!
Oops! Something went wrong while submitting the form.